Wednesday, October 31, 2018

[PART 4] NuTracker, ReactJS application - Finish Dashboard Read functionality

In the previous part we added the first call to the async api to do search, now we will build on that to call more apis, and to add more components on the page to finish up the Display flows (i.e. what doesn't require writes / forms) :
  • search
    • this allows the user to find a specific food and choose to add an entry for it to their day to record that they consumed a specific portion of that food.
  • show entries
    • This feature is to allow users to see what they recorded as a list of entries, each entry represents a food the user added on a specific date.
  • show progress bars
    • The user will be able to set goals like how many calories, proteins, fats they want to consume daily and these bars will calculate from the entries they added how close they are to their daily goals
  • reload entries & progress metrics when date change 
    • This is to provide the ability for the users to go back in history and see their entries.

all this is in general similar to the steps I did before:
- add presentation component
- add add actions (api calls or anything else) & reducers ( store the responses in the state and calculate new state if the date changed for example )
- add container component to pass the props to the presentation


all the code for this day is in this pull request ( so you can check exactly what was added and changed), I have also added comments on some files there to explain a little bit.
It's easier to see and navigate files in the "Files Changed" tab in Github PR page


Things Worth noting


 Components Interaction


Up to this point the dashboard didn't have any interaction across components
but in this PR I added the Date navigator which when a user navigates in one direction should load the Entries they created for that new Date they are on, I addition the progress metrics should update according to the new entries.
the way I did this was :
1- when dashboard first loads it just loads the current day information, so the entries list component will  (in componentDidMount) and fetch today's entries).
2- if the user go back in date navigator that triggers a redux action (PERIOD_CHANGED, see dateNavActions.js)
3- the period reducer will update the state with the new start/end dates
4- Our DayEntries component uses state.period as props, so when the state changed because of the date navigation action above, our component will be rerendered.
5- since this is a rerender and not mounting, we have to use the componentWillReceiveProps life cycle method to trigger a new redux action to fetch the entries for the new date period.


 Introducing RequestBuilder

this class is a helper to be used by the repos to inject headers and parse reposne as json, this saves us from repeating this logic everywhere.

Adding User info to state

Since we now want to show progress bars about user goals, I added an api call through userRepo to get the user profile from backend (see Dashboard component), there was no login needed because I hardcoded the user token in the request builder, this way we have real user information without being blocked on login being ready to do this work but in the same time we deal with real data model of the user.


In the next part I plan to :
1- create a dummy login page
2- use react-router to have multiple pages in our app (login, dashboard, profile) each with it's own url

Friday, October 19, 2018

Using Windows 10 built in bash to ssh to ec2 instance

Using Windows 10 built in bash to ssh to ec2 instance


detailed steps to install bash on windows here: https://www.thewindowsclub.com/run-bash-on-windows-10

Summary:

0- enable windows subsytem for linux
1- open cmd
2- type bash
3- accept and create a unix user account
4- wait to finish
6- you may need to reboot

reopen cmd and type bash, you should see your cmd prompt changed.

5- to ssh to ec2 you need .pem key file that you download when you create the instance
6- copy that file under /home or something else but not under /mnt/* (windows files) because the next step will not work, the file has to be in a linux directory (bash in windows can't change windows files permissions)
7- we have to run this command :
$ chmod 400 pem_file.pem
because otherwise you will get an error that this key permissions are too open (not secure enough).
8- the command is ssh -i "pem_file.pem" ec2-user@123.456.897  (replace the pem file name and ip with your values).

now you can connect from windows terminal without ssh client/PuTTy  and this bash can be used for other bash command and tools like telnet etc.. fun :)

Tuesday, October 9, 2018

Online IDE stackblitz.com :)


I stumbled upon this neat online IDE, where you can :

- instantly start, share and run code
- use npm dependencies and install what you need quickly
- you can drag drop files from your computer
I'm yet to explore it but seems very promising

it also has a neat feature to embed itself in blogs like this one so that's awesome because now I can show live examples of running code and share them with my readers !

all I had to do is include an iframe with url to my test project on their website

this is an example of a react project   :)


Kudos to the people who create this cool stuff and share with us !

Saturday, October 6, 2018

Gensim NLP and TF-IDF document search example


In this blog I'll try to use an NLP (Natural language processing) library to get to:
- know some basic concepts and
- try to search a data set of books metadata (author, title, summary) to respond to user query

Setup
 you need:
- Anaconda (python environment management tool), get it here
Anaconda works by creating an isolated installation of python with the packages needed and it won't affect other environments so you can run different versions of python and other python libraries without conflicts
- code: https://github.com/blabadi/gensim-books

- setup the environment (in shell window or in anaconda prompt) run:
conda create gensim_env python=3.5 gensim nltk jupyter
this will install the packages needed
- navigate to the code directory, run:
jupyter notebook

this will open the server web page and you can select the notebook that we need now : gensimWord2Vec

Code
https://github.com/blabadi/gensim-books/blob/master/gensimTFIDF.ipynb

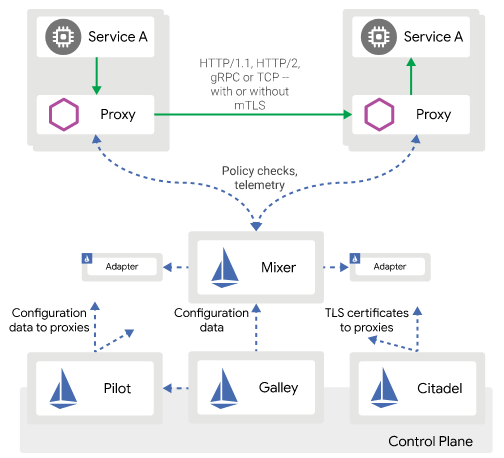
Istio —simple fast way to start

istio archeticture (source istio.io) I would like to share with you a sample repo to start and help you continue your jou...